Use your old  as serial Terminal! as serial Terminal!
Recycle your old Commodore 64 and use it as serial Terminal for your microcontroller projects, your
Linux box or your MyCPU or MyNOR!
This page describes an expansion cartridge
for the C64 that turns your C64 into an universal ANSI compatible RS232 Terminal.
Features:
- ANSI compatible Terminal, 7 Bit character set
- 80x24 character screen on the Commodore 64 (!!)
- all common escape sequences are supported
- supports coloured text (still experimental)
- serial speed up to 115200 baud with handshake
- uses a standard 16C550 UART chip with 16 byte FIFO
- plug and play: single cartridge, no floppy disk required
- a hexadecimal display mode for incomming data is implemented
- all configuration data is permanently stored in an EEPROM
- the project is fully open source
Download the EAGLE-files:
eagle-files.zip
Download the cartridge board layout as pdf:
layout.pdf
Download the cartridge gerber files:
term-gerber.zip
Download the source-code:
termsoftware.zip
|
|
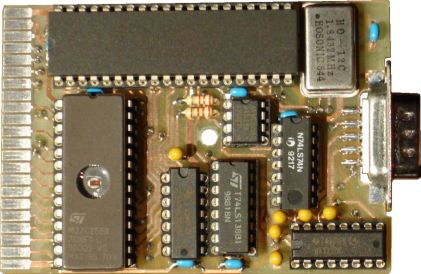
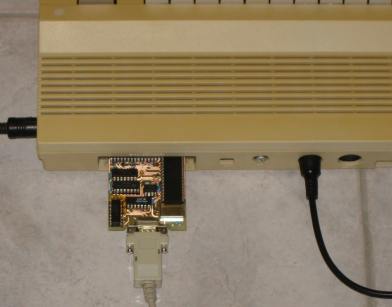
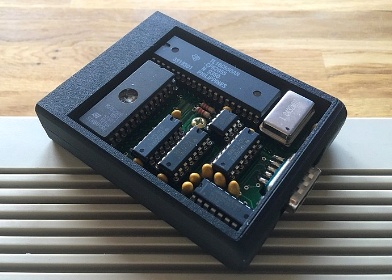
This is the prototype of the cartridge:
|
|
Jörg Reinhard has designed a housing for the PCB.
You can download his STL files for 3D-printing here:
housing.zip
The housing is available in two variants. One without
cover if you use sockets for all ICs, and one with cover,
if only the UART is socketed.
Jörg can be contacted through his website.
|
|
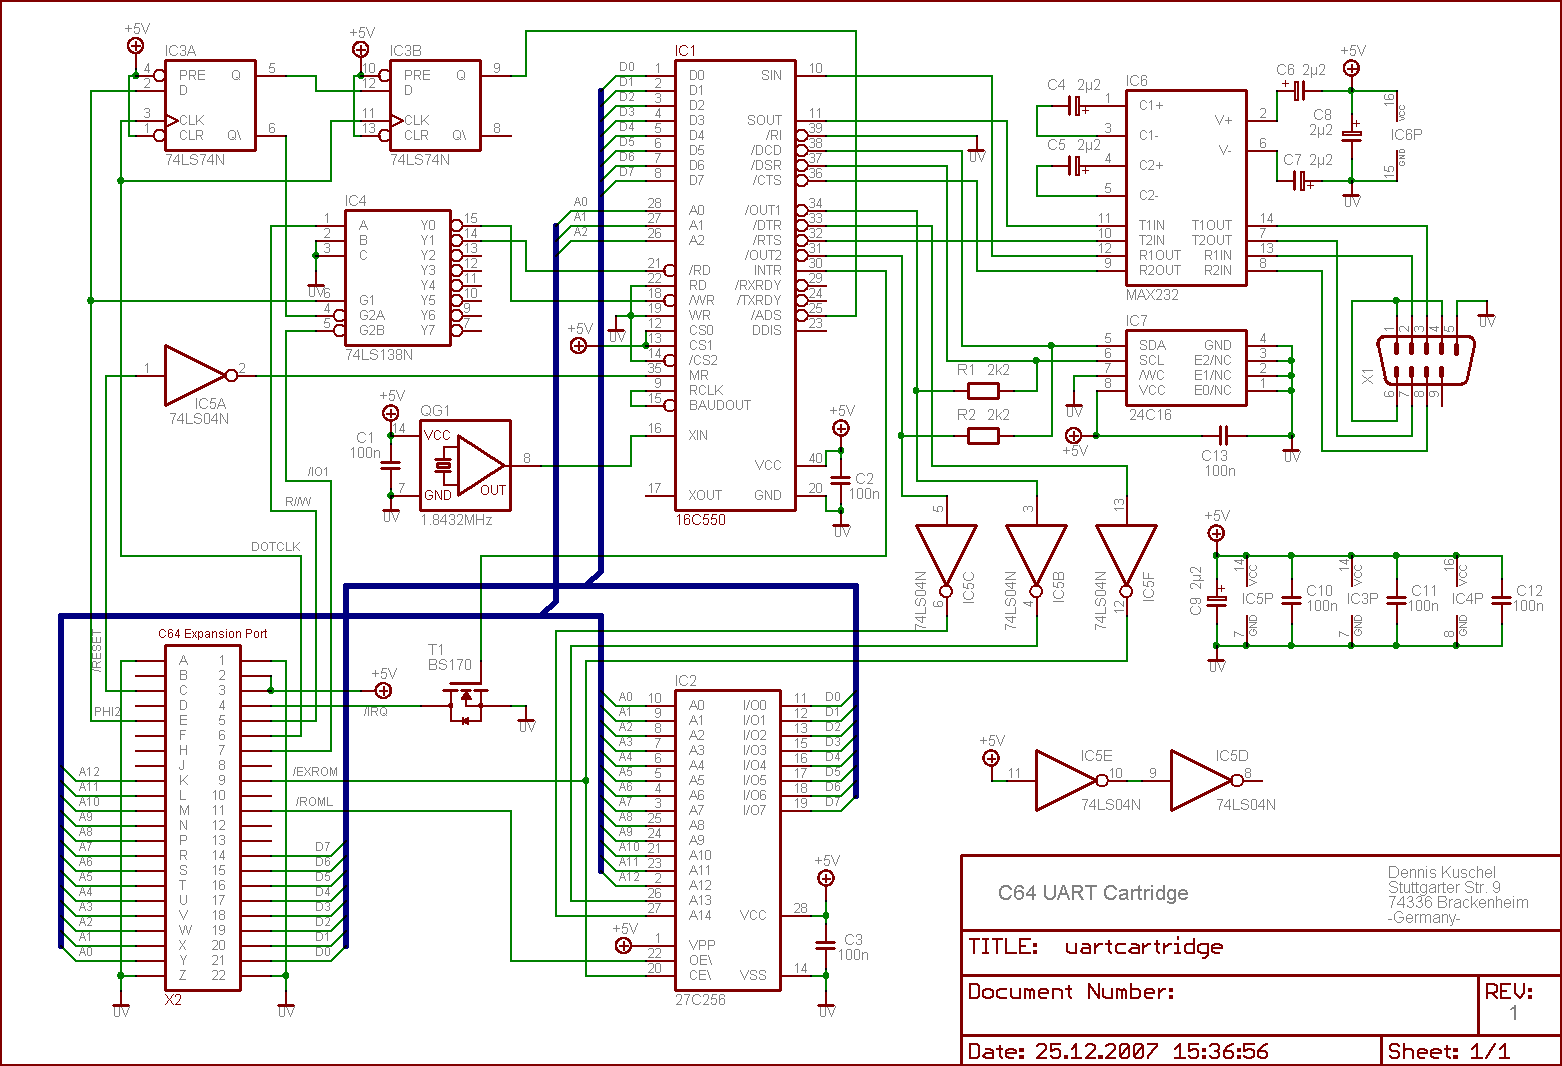
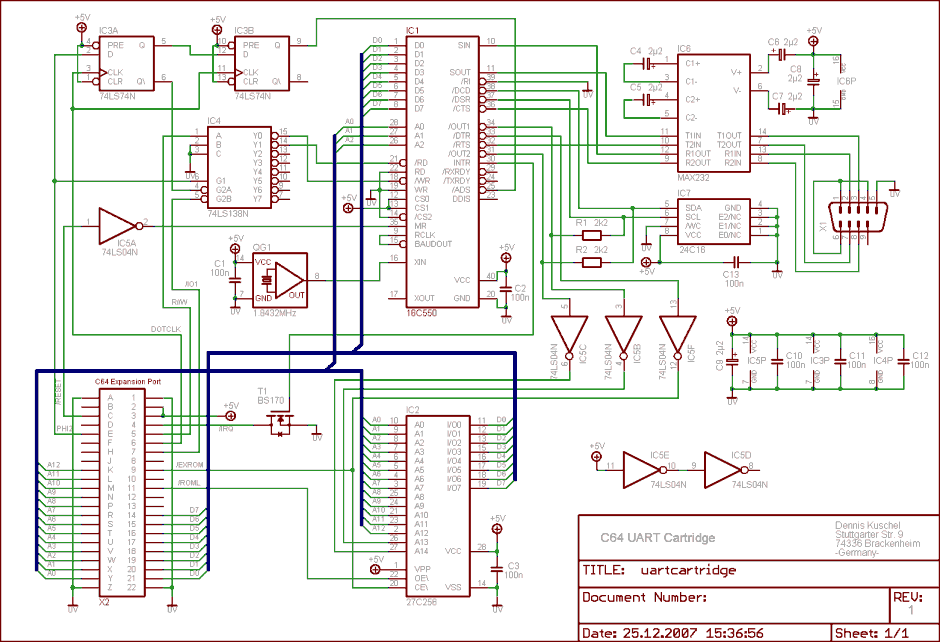
Schematic of the cartridge:
|
|
If you want to build this cartridge you will find everything you need on this page.
I recommend you to use the gerber-files of the PCB to
let the board be manufactured at some pool based factory like
JLCPCB. But you can also download
the PCB Layout if you whish to etch the board yourself.
At the right side you see the placeplan of the board. Please use sockets for all
the integrated circuits. At least the UART chip IC1 must be fitted with a socket,
otherwise you won't be able to place the transistor T1. Please follow the placing order
in blue numbers, otherwise you won't
be able to solder the red pads
at the top side of the board (this does not apply if you use a manufactured PCB).
Start with placeing the sockets for the integrated circuits, then continue with the
resistors and capacitors. Fit the remaining transistor, oscillator and the SUB-D connector.
Download the software archive,
and extract the file rom.bin. Use an EPROM programming device to program the
file rom.bin into the EPROM IC2. Note that the upper area of the EPROM remains unused.
List of required components:
| Pieces |
Value |
Components |
| 7 |
100n |
C1 - C3, C10 - C13 |
| 6 |
2,2µF Tantalum |
C4 - C9 |
| 1 |
16C550 |
IC1 |
| 1 |
27C256 |
IC2 |
| 1 |
74LS74 |
IC3 |
| 1 |
74LS138 |
IC4 |
| 1 |
74LS04 |
IC5 |
| 1 |
MAX232 |
IC6 |
| 1 |
24C16 |
IC7 |
| 1 |
1,8432MHz |
QG1 |
| 2 |
2,2 K |
R1, R2 |
| 1 |
BS170 |
T1 |
| 1 |
SUBD9, male |
X1 |
Hint:
You can use the UART cartridge also for other applications. Please remove the EPROM and
cut the /EXROM -wire near to the expansion board connector. The UART can be accessed through the
memory area $DE00-$DEFF. If you whish to uses this "universal UART cartridge" as terminal
you can still load the file terminal.prg from disk (the file is included in the
softare package).
|
|
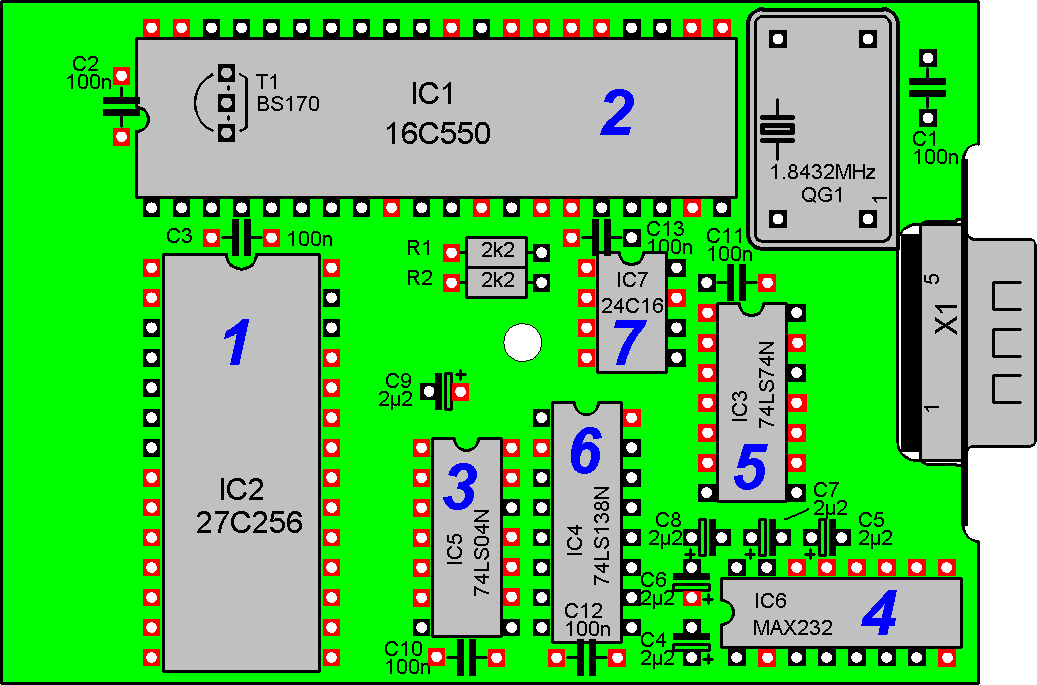 Component Placeplan
|
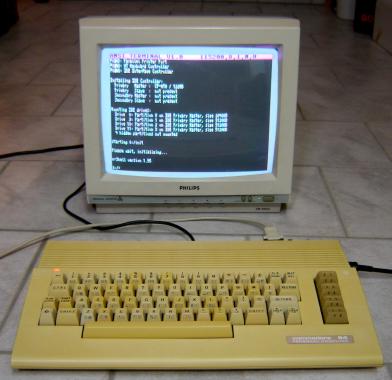
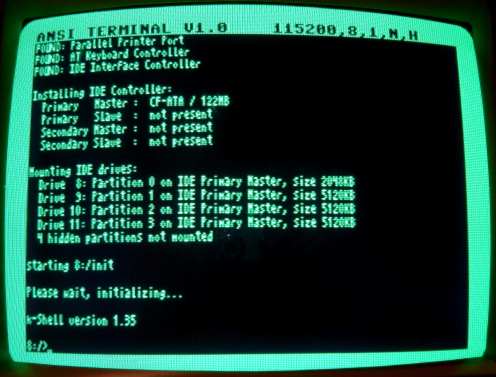 This is a close-up of the C64 Terminal Screen. As you can see the
80x24 character screen (in monochrome mode) is easy to read.
The screenshot shows the boot sequence of the
MyCPU
This is a close-up of the C64 Terminal Screen. As you can see the
80x24 character screen (in monochrome mode) is easy to read.
The screenshot shows the boot sequence of the
MyCPU
If you have questions please email me: dennis_k@freenet.de
|
|
|
|